Organizations today are highly dynamic, with employees, contractors, and other users constantly joining. Accordingly, IT administrators often need to create user objects in Active Directory (AD) or Entra ID (formerly Azure AD). While manually creating a single user is easy, repeating that process for multiple users is tedious and time-consuming. Moreover, it is highly prone to errors that can put security and productivity at risk.
This article explains how you can streamline the process of creating AD users in bulk using PowerShell, as well as how to create users in bulk in Entra ID using the native wizard. Then it offers a third-party solution that enables you to easily create users in AD or Entra ID right from an intuitive interface.
Bulk User Creation in Active Directory via PowerShell
Microsoft PowerShell is a popular option for bulk creation of Active Directory users. You must have the ISE PowerShell module installed and have administrative rights to create user accounts in Active Directory.
Keep in mind that only IT pros with solid scripting skills should use PowerShell. Never run a script that you do not thoroughly understand.
- Build a CSV file with details about the users you want to create. The file must include the following fields: SAMAccount, FirstName, LastName, Password and OU. You can add more fields if you want to. Here is an example of a csv file as it appears in Notepad:

For a clearer view of the rows and columns, you can open the file in Microsoft Excel:

- Create the users. Run the following PowerShell script from the Windows PowerShell ISE:
# Import the PowerShell module for running AD cmdlets
Import-Module activedirectory

#Store the data from your CVS file in the $ADUsers variable
$ADUsers = Import-csv C:\BulkUsers.csv

#Read each row of input data and assign each user’s details to variables
foreach ($User in $ADUsers)
{
$Username = $User.name
$Password = $User.password
$Firstname = $User.firstname
$Lastname = $User.lastname
$OU = $User.OU
$email = $User.email
$streetaddress = $User.address
$city = $User.city
$state = $User.state
$country = $User.country
$zipcode = $User.zipcode
$telephone = $User.telephone
$jobtitle = $User.title
$company = $User.company
$department = $User.department

#Check whether the user already exists in the AD
if (Get-ADUser -F {SamAccountName -eq $Username})
{
#If the user already exists, display a warning
Write-Warning "A user account with username $Username already exists in Active Directory."
}
else
{
#Otherwise, create the new user account in the specified OU
New-ADUser  SamAccountName $Username  UserPrincipalName "$Username@milkyway.local"  Name “$Firstname $Lastname”  GivenName $Firstname  Surname $Lastname  Enabled $True  DisplayName "$Lastname, $Firstname"  Path $OU  City $city  Company $company  State $state  StreetAddress $streetaddress  OfficePhone $telephone  EmailAddress $email  Title $jobtitle  Department $department  AccountPassword (convertto-securestring $Password -AsPlainText  Force)  ChangePasswordAtLogon $True
}
}
- Verify the results. You can review the user objects in Active Directory Users and Computers (ADUC).
Bulk User Creation in Entra ID
Entra ID enables you to create users in bulk with no scripting. Here are the steps to take:
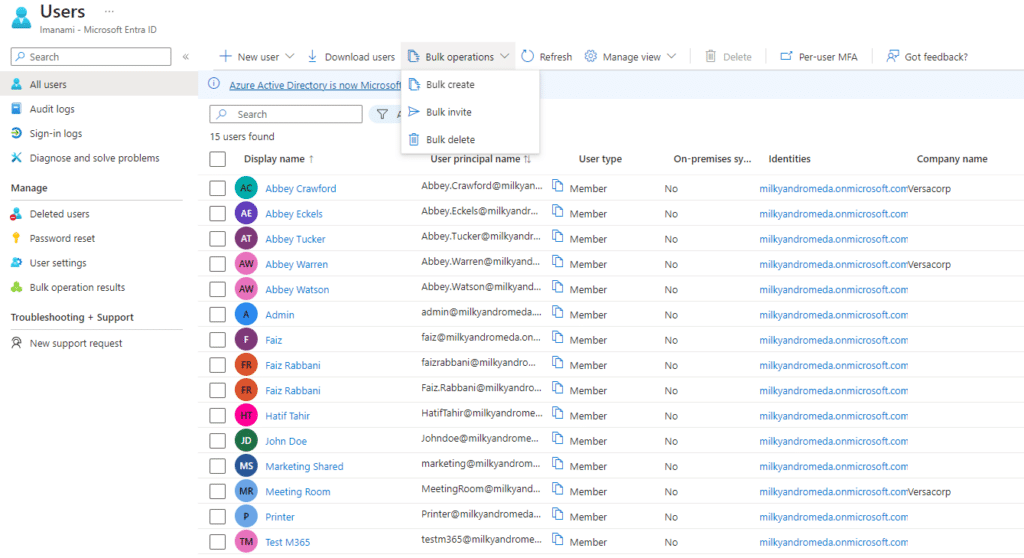
- Open the Bulk User Creation Wizard. Sign into the portal as a User Administrator or Global Administrator. Navigate to Users. Click the Bulk operations option and select Bulk create, as shown below.
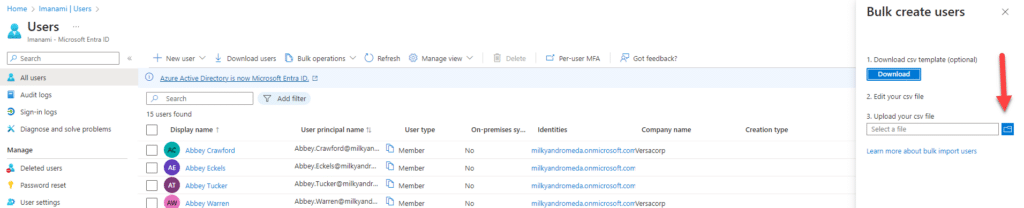
- Create a CSV file of the users. The wizard will provide a template CSV file. Replace the example row with a row for each user you want to create, specifying all the required attributes and any optional attributes you like. Save the file.
- Upload the file. Click Upload your File and select the file you created. The system will begin creating the users.
- Review the results. You can review successful and unsuccessful outcomes and a summary of the user accounts created from the notification bar at the top. To check the user accounts, go to the Users tab.
Bulk User Creation with Netwrix GroupID
Netwrix GroupID empowers you to create users in bulk easily using the Synchronize module. Simply create a new job and follow the steps in the wizard:
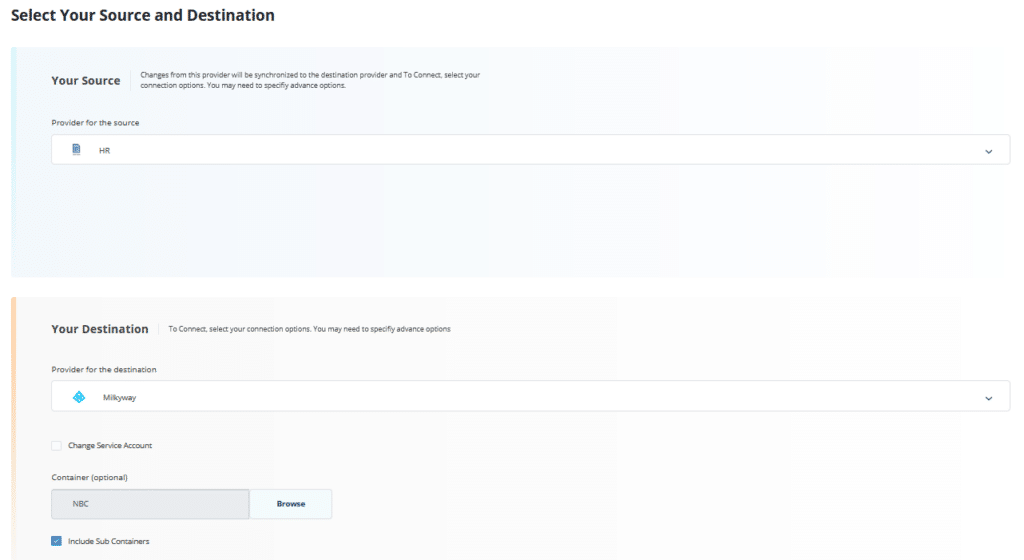
- Specify the data source and the destination identity store. Supported data sources include CSV files and popular databases like Oracle and SQL Server. Supported identity store providers include Active Directory and Entra ID, as well as generic LDAP and Google Workspace. Let’s select HR (which contains a CSV file) as the source data provider, and create the users in the NBC container in the AD identity provider Milkyway:
- Choose the type of object to be created.In this case, we will choose to create user objects:
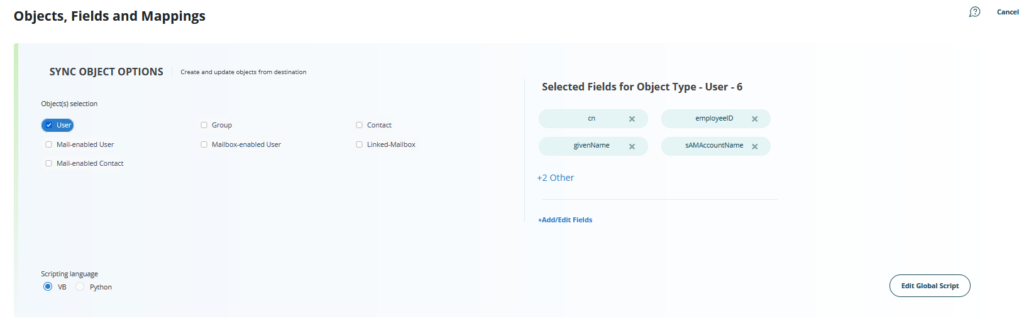
- Map user attributes from source to destination. Click +Add/Edit Fields, choose the Create radio button, and select the attributes to include in each user object being created. Click Save.
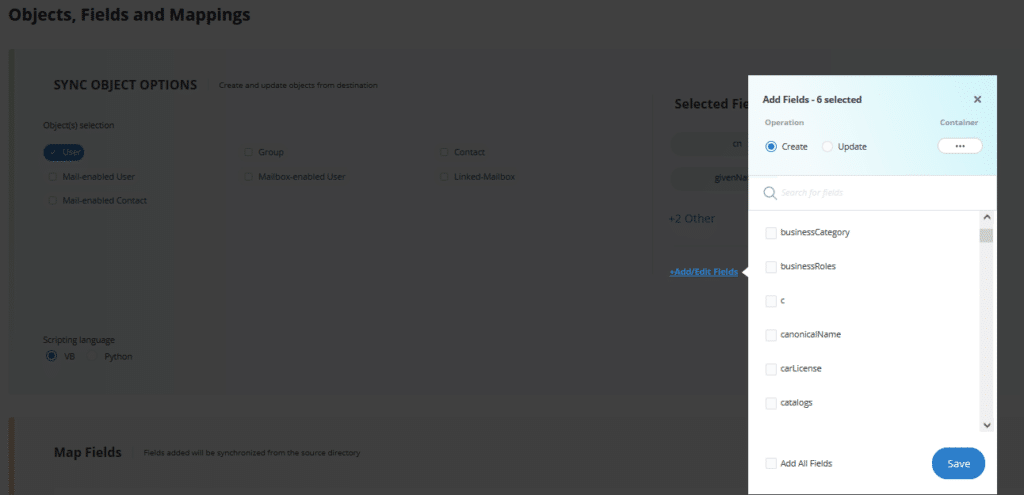
- In the lower part of the dialog, specify the attribute mapping from source to destination:

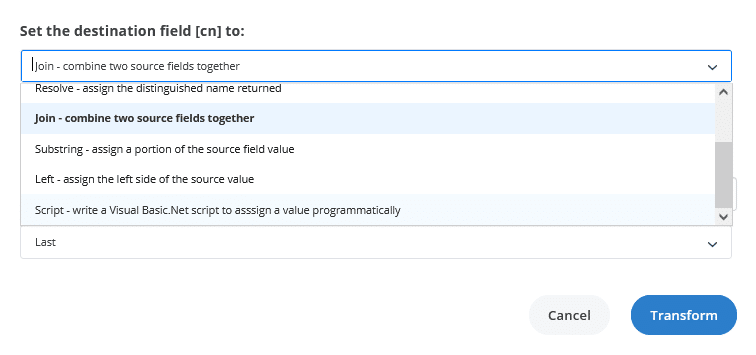
- Transform the source data (optional). You can choose to manipulate the source data before it is used to create users at the destination. For example, you could combine the values of two source fields into one destination field or assign a string constant to a field. If you like, you can write your transformation scripts using the Visual Basic .NET editor.
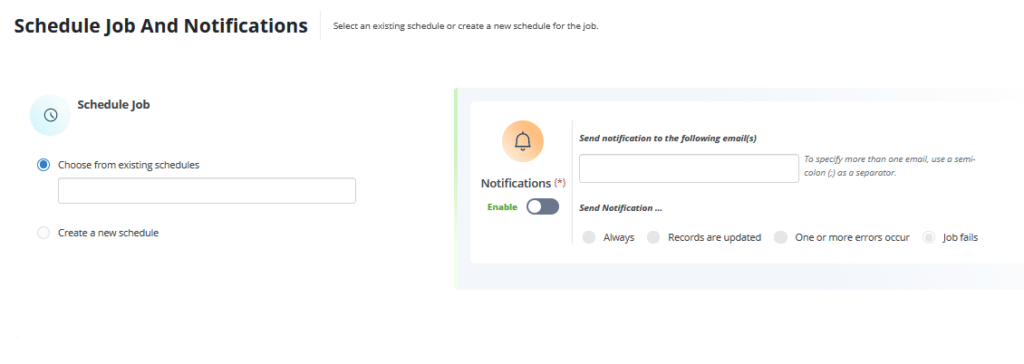
- Set up job notifications. Specify one or more email address for job notifications. You can also specify the conditions for sending notifications.
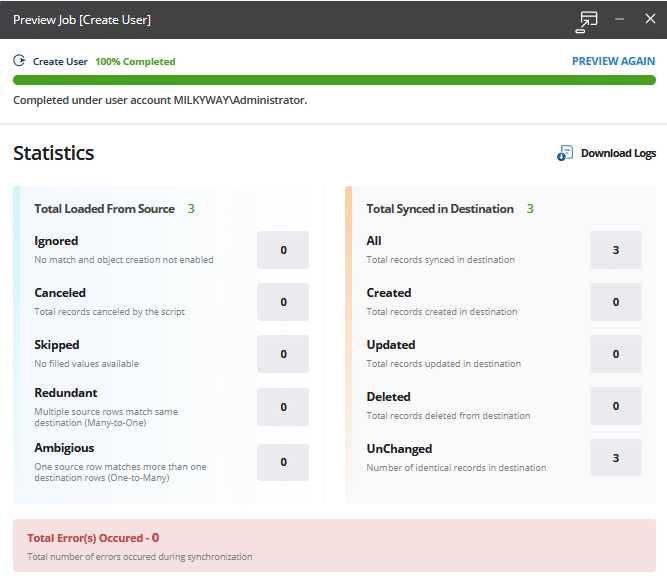
- Preview and run the job. The wizard provides a preview of your job and enables you to easily revise any area that does not meet your needs. When the job is correct, run it to create the users in bulk, and review the resulting statistics.
Updating Users in Bulk
Sometimes, administrators need to an existing set of user objects rather than create new users. Like manual user creation, manual user updates are time-consuming and error-prone. To help, Netwrix GroupID allows you to save the job that you used to create users as a template; if you later need to update those users, simply edit the job and run it. You can even schedule the job to run periodically and notify you when it has been performed.